Python GUI Programming
Tkinter is the standard GUI (Graphical User Interface) library for Python. It provides a way to create windows, dialogs, and other graphical elements that can respond to user input. Tkinter is lightweight, cross-platform, and comes pre-installed with most Python distributions, making it an accessible choice for developing desktop applications.
In this lesson, we’ll create a basic windowed application that supports user interaction. Woohoo!
Table of Contents
Why Use Tkinter?
- Ease of Use: Tkinter has a simple API, making it ideal for beginners who want to create basic GUI applications without a steep learning curve.
- Cross-Platform: Applications built with Tkinter work on Windows, macOS, and Linux without requiring major changes.
- Built-In: Since Tkinter is included with Python, there’s no need to install any external libraries to start developing GUIs.
Setting Up Tkinter
Tkinter comes pre-installed with Python, so you don’t need to install anything extra. To check if Tkinter is available in your Python installation, try importing it:
import tkinter as tk
If no errors are raised, you’re ready to start building GUIs.
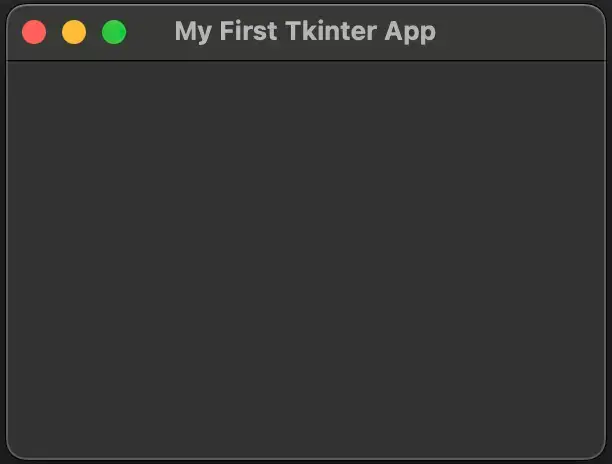
Creating a Basic Tkinter Window
Let’s start by creating a simple window using Tkinter.
import tkinter as tk

# Create the main window
root = tk.Tk()

# Set the window title
root.title("My First Tkinter App")

# Set the window size (width x height)
root.geometry("300x200")

# Start the Tkinter event loop
root.mainloop()
Explanation:
tk.Tk(): This creates the main window for your application.root.title(): Sets the title of the window.root.geometry(): Sets the size of the window (width x height).root.mainloop(): Starts the Tkinter event loop, which waits for user input (e.g., button clicks or text input). This is necessary to keep the window open and responsive.
Adding Basic Widgets
Tkinter provides several types of widgets (GUI elements), such as labels, buttons, entry fields, and more. Let’s explore some of the most commonly used widgets.
1. Adding a Label
A label is a widget used to display text in the window.
label = tk.Label(root, text="Hello, Tkinter!")
label.pack()  # Add the label to the window
Label(): Creates a label widget with the specified text.pack(): Places the widget in the window. Tkinter uses different layout managers likepack(),grid(), andplace()to control widget placement.
2. Adding a Button
A button is a clickable widget that can trigger an action when pressed.
def on_button_click():
    print("Button clicked!")

button = tk.Button(root, text="Click Me", command=on_button_click)
button.pack()
Button(): Creates a button widget with the specified text. Thecommandparameter takes a function that is executed when the button is clicked.on_button_click(): This is the function that runs when the button is clicked, and it prints a message to the console.
3. Adding an Entry (Text Input)
An entry is a single-line text input widget.
entry = tk.Entry(root)
entry.pack()

def get_entry_text():
    print("You entered:", entry.get())

button = tk.Button(root, text="Submit", command=get_entry_text)
button.pack()
Entry(): Creates a text input field.entry.get(): Retrieves the text entered in the entry field.- The button triggers the
get_entry_textfunction, which prints the entered text.
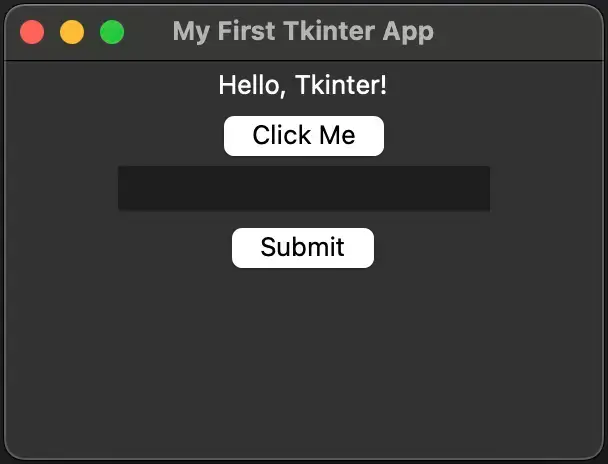
Example Tkinter widgets
Layout Management in Tkinter
Tkinter provides three layout management methods: pack(), grid(), and place().
1. pack()
The pack() method places widgets one after another (from top to bottom by default). It’s simple to use but doesn’t offer precise control over the position of the widgets.
label1 = tk.Label(root, text="Label 1")
label1.pack()

label2 = tk.Label(root, text="Label 2")
label2.pack()
2. grid()
The grid() method arranges widgets in a grid of rows and columns. It offers more control over layout compared to pack().
label1 = tk.Label(root, text="Username:")
label1.grid(row=0, column=0)

entry1 = tk.Entry(root)
entry1.grid(row=0, column=1)

label2 = tk.Label(root, text="Password:")
label2.grid(row=1, column=0)

entry2 = tk.Entry(root, show="*")
entry2.grid(row=1, column=1)
In this example, labels and entry fields are arranged in two rows and two columns.
3. place()
The place() method allows you to specify the exact position of widgets using coordinates.
label = tk.Label(root, text="Hello, Tkinter!")
label.place(x=50, y=50)
This places the label at coordinates (50, 50) in the window.
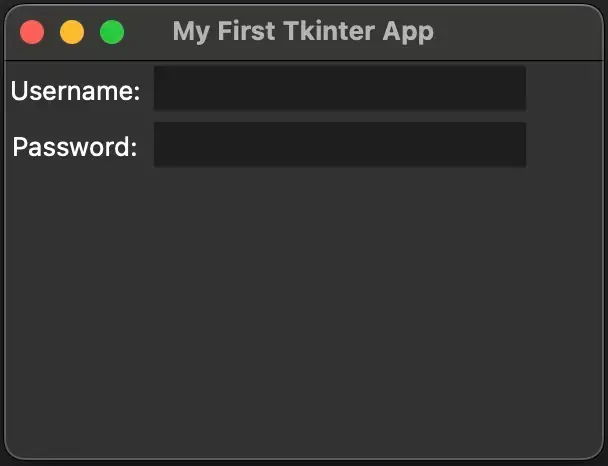
Tkinter Grid Layout
Handling Events and Callbacks
Tkinter applications are event-driven, meaning they respond to user actions such as button clicks, key presses, or mouse movements. You can bind events to widgets to handle these actions.
Binding Events to Widgets
You can use the bind() method to bind specific events to a widget.
Example: Responding to a mouse click:
def on_click(event):
    print("Mouse clicked at", event.x, event.y)

label = tk.Label(root, text="Click anywhere")
label.bind("<Button-1>", on_click)  # Bind left mouse click event
label.pack()
<Button-1>: Represents a left mouse click.- The
on_clickfunction prints the coordinates of the click.
Other common events include:
<KeyPress>: Key press event.<Enter>: Mouse entering the widget.<Leave>: Mouse leaving the widget.
Adding Dialogs
Tkinter provides several built-in dialog boxes for tasks such as file selection, showing messages, or getting user confirmation.
Messagebox
You can use the messagebox module to display information or prompt the user.
Example:
from tkinter import messagebox

def show_message():
    messagebox.showinfo("Information", "This is a message.")

button = tk.Button(root, text="Show Message", command=show_message)
button.pack()
messagebox.showinfo(): Displays an information dialog with a title and message.
File Dialog
You can use the filedialog module to open a file selection dialog.
Example:
from tkinter import filedialog

def open_file():
    file_path = filedialog.askopenfilename()
    print("Selected file:", file_path)

button = tk.Button(root, text="Open File", command=open_file)
button.pack()
filedialog.askopenfilename(): Opens a file dialog and returns the selected file path.
Building a Simple Tkinter Application
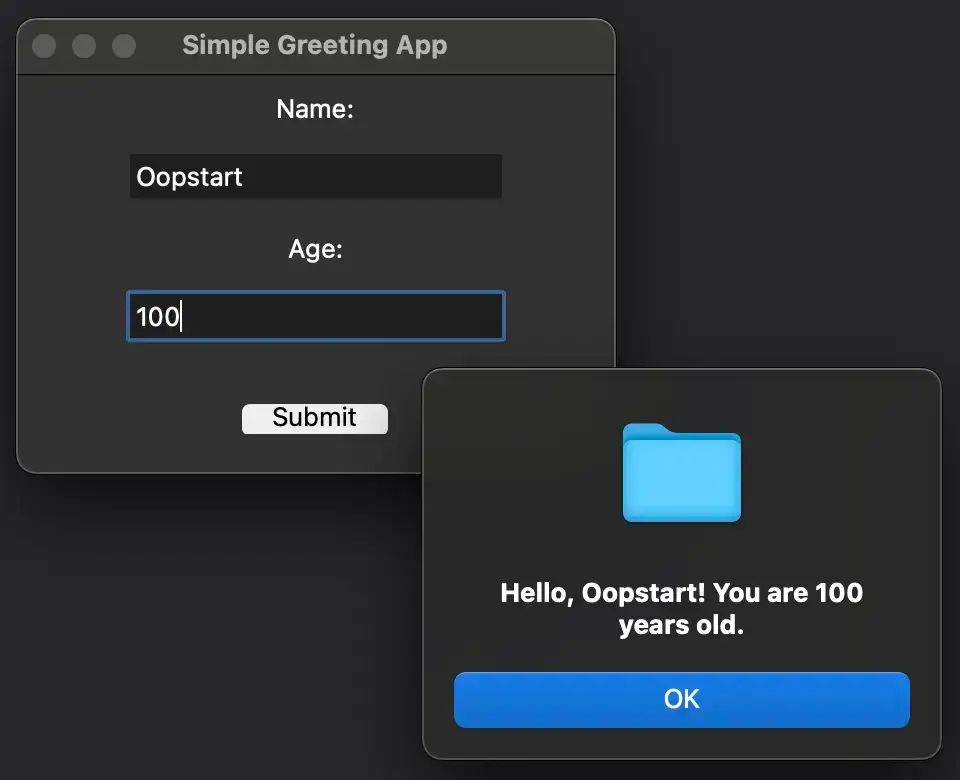
Let’s build a simple GUI application that allows the user to enter their name and age, and then displays a greeting message.
import tkinter as tk
from tkinter import messagebox

def display_greeting():
    name = name_entry.get()
    age = age_entry.get()
    if name and age:
        messagebox.showinfo("Greeting", f"Hello, {name}! You are {age} years old.")
    else:
        messagebox.showwarning("Input Error", "Please enter both your name and age.")

# Create main window
root = tk.Tk()
root.title("Simple Greeting App")
root.geometry("300x200")

# Create and place widgets
tk.Label(root, text="Name:").pack(pady=5)
name_entry = tk.Entry(root)
name_entry.pack(pady=5)

tk.Label(root, text="Age:").pack(pady=5)
age_entry = tk.Entry(root)
age_entry.pack(pady=5)

tk.Button(root, text="Submit", command=display_greeting).pack(pady=20)

# Start the event loop
root.mainloop()
- The user can enter their name and age.
- When the Submit button is clicked, the app displays a greeting message using
messagebox.showinfo().
Key Concepts Recap
In this lesson, we covered:
- The basics of GUI programming with Tkinter.
- How to create a window, add widgets (labels, buttons, entries), and manage layouts.
- How to handle events and user interactions.
- How to display dialogs like message boxes and file selectors.
Tkinter provides a straightforward way to build desktop applications, making it a great tool for simple projects or prototyping.
Exercises
- Create a Tkinter application that allows the user to enter two numbers, then displays the sum when a button is clicked.
- Build a simple login form with
UsernameandPasswordfields. Display a message box showing whether the credentials are correct (you can hardcode the correct credentials). - Create a file selector in Tkinter using
filedialog.askopenfilename(). After selecting a file, display its file path in a label. - Use the
grid()layout manager to create a simple form with labels and input fields for first name, last name, and email. Add a submit button that prints the entered values to the console.
You can learn more about Tkinter in the official documentation.
FAQ
Q1: What is the difference between pack(), grid(), and place() in Tkinter?
A1: These are layout management methods that control how widgets are arranged in a Tkinter window:
pack(): Simple layout manager that stacks widgets vertically or horizontally. It doesn’t provide much control over precise positioning.- Example:
widget.pack(side="top") grid(): Organizes widgets in a grid of rows and columns. It offers more control thanpack()and is commonly used for forms.- Example:
widget.grid(row=0, column=0) place(): Provides precise control by placing widgets at exact coordinates usingxandy.- Example:
widget.place(x=50, y=100)
Use pack() for simple layouts, grid() for more structured layouts, and place() when you need absolute positioning.
Q2: Can I use pack() and grid() in the same window?
A2: No, you should not use pack() and grid() on widgets within the same container (e.g., the same window or frame). Mixing them can cause layout conflicts and lead to unpredictable results. Choose one layout manager for each container, although different containers (like different Frame widgets) can use different layout managers.
Q3: How do I handle resizing the window? My widgets don’t resize when the window size changes.
A3: To make widgets resize dynamically when the window is resized:
- For
pack(): Use theexpand=Trueandfill="both"options to make the widget expand and fill available space.
widget.pack(expand=True, fill="both")
- For
grid(): Userowconfigure()andcolumnconfigure()to make rows and columns expandable.
  root.grid_rowconfigure(0, weight=1)
  root.grid_columnconfigure(0, weight=1)
This ensures that your widgets adjust based on the window’s size.
Q4: How do I close a Tkinter window programmatically?
A4: You can close a Tkinter window using the root.destroy() method. This stops the Tkinter event loop and closes the application.
Example:
root.destroy() # Closes the window
Alternatively, you can bind this to a button or event handler to allow the user to close the window by clicking a button.
Q5: How do I pass arguments to a function triggered by a button?
A5: You can pass arguments to a function using a lambda function in the command argument of the button.
Example:
def greet(name):
    print(f"Hello, {name}")

button = tk.Button(root, text="Greet", command=lambda: greet("Alice"))
button.pack()
This ensures that the greet() function receives the name argument when the button is clicked.
Q6: How do I update the text in a label after an event?
A6: You can update the text of a label using the .config() method.
Example:
label = tk.Label(root, text="Original Text")
label.pack()

def update_label():
    label.config(text="Updated Text")

button = tk.Button(root, text="Update", command=update_label)
button.pack()
When the button is clicked, the label text will change to “Updated Text.”
Q7: How do I handle multiple windows in Tkinter?
A7: You can create multiple windows in Tkinter using the Toplevel() widget, which creates a new window separate from the main window.
Example:
def open_new_window():
    new_window = tk.Toplevel(root)
    new_window.title("New Window")
    new_window.geometry("200x100")
    tk.Label(new_window, text="This is a new window").pack()

button = tk.Button(root, text="Open New Window", command=open_new_window)
button.pack()
Toplevel() is used to create additional windows, while the main window is managed by tk.Tk().
Q8: How do I handle user input validation in Tkinter?
A8: To validate user input, you can check the input before performing an action (like submitting a form) and use a messagebox to notify the user of errors.
Example:
from tkinter import messagebox

def validate_input():
    name = entry.get()
    if not name:
        messagebox.showwarning("Validation Error", "Name cannot be empty.")
    else:
        messagebox.showinfo("Success", f"Hello, {name}!")

entry = tk.Entry(root)
entry.pack()

button = tk.Button(root, text="Submit", command=validate_input)
button.pack()
This script checks whether the entry field is empty and displays a warning if it is.
Q9: How do I capture keyboard events (e.g., when the user presses a key)?
A9: You can capture keyboard events using the bind() method. For example, to capture when a user presses the Enter key:
Example:
def on_enter_key(event):
    print("Enter key pressed")

root.bind("<Return>", on_enter_key)  # Bind the Return (Enter) key
This captures the Enter key and calls the on_enter_key function when it is pressed. You can bind other keys using their corresponding event names (e.g., <KeyPress-a> for the “a” key).
Q10: How do I set a default value in an Entry widget?
A10: You can set a default value in an Entry widget using the .insert() method after creating the entry field.
Example:
entry = tk.Entry(root)
entry.pack()
entry.insert(0, "Default Value")  # Insert default text at the first position (index 0)
This inserts “Default Value” into the text field when the application starts.
Q11: What’s the best way to handle long-running tasks in a Tkinter application without freezing the UI?
A11: Tkinter runs a single-threaded event loop, so long-running tasks (e.g., file downloads, database queries) can freeze the UI if not handled correctly. To avoid this, you can use multithreading.
Example using threading:
import threading

def long_task():
    # Simulate a long-running task
    import time
    time.sleep(5)
    print("Task completed")

def start_task():
    threading.Thread(target=long_task).start()

button = tk.Button(root, text="Start Task", command=start_task)
button.pack()
This starts the long-running task in a separate thread, allowing the UI to remain responsive.
Q12: How can I change the font size or style of widgets in Tkinter?
A12: You can change the font size and style using the font argument in widgets like Label, Button, etc.
Example:
label = tk.Label(root, text="Styled Text", font=("Arial", 16, "bold"))
label.pack()
This sets the text font to Arial, size 16, and makes it bold. You can adjust the font family, size, and style as needed.
Q13: How do I center a window on the screen?
A13: You can center a Tkinter window by calculating the screen size and window size, then positioning the window accordingly using the .geometry() method.
Example:
def center_window(window, width, height):
    screen_width = window.winfo_screenwidth()
    screen_height = window.winfo_screenheight()
    x = (screen_width // 2) - (width // 2)
    y = (screen_height // 2) - (height // 2)
    window.geometry(f"{width}x{height}+{x}+{y}")

root = tk.Tk()
center_window(root, 400, 300)  # Center a 400x300 window
root.mainloop()
This function centers a 400×300 window on the screen.
Thanks once again for all the questions!
Don’t forget you can search the official Tkinter documentation for more info.