Python Version Control
Version control systems help you track changes in your codebase, collaborate with other developers, and manage different versions of your project. Git is the most popular version control system, and GitHub is a widely-used platform for hosting Git repositories.
In this lesson, we’ll cover basic Git commands, how to use GitHub, and how to push Python projects to a repository.
Table of Contents
What is Version Control?
Version control is a system that records changes to files or projects over time, allowing you to:
- Track Changes: View who made changes and what was changed.
- Collaborate: Multiple developers can work on the same codebase simultaneously without overwriting each other’s work.
- Branching: Create separate branches to experiment with new features without affecting the main project.
- Rollback: Revert to previous versions of your code if something goes wrong.
Git is a distributed version control system, meaning each developer has a complete copy of the repository, including its entire history, on their local machine.
Installing Git
If git is not available on your system, you will need to install it. You can download Git from the official website: https://git-scm.com/.
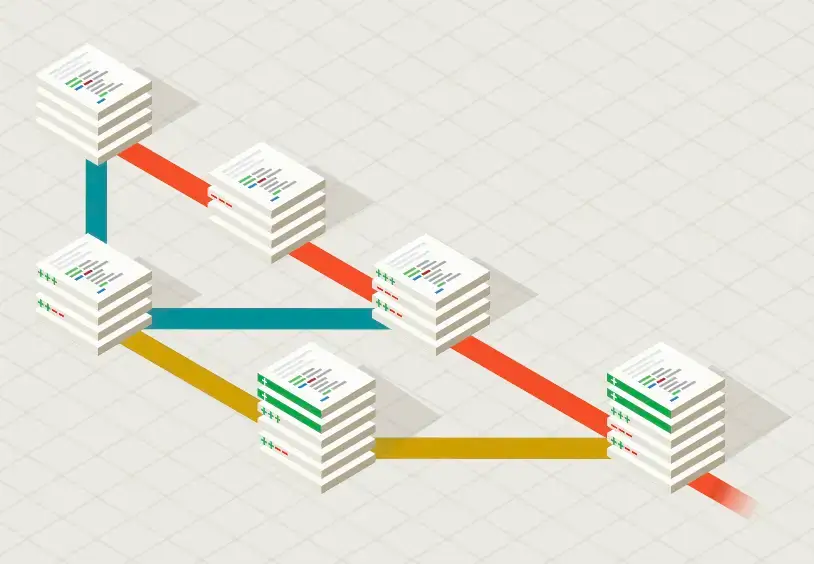
Different versions of your code can exist on different ‘branches’
After installation, verify that Git is installed correctly by running:
git --version
Basic Git Commands for Python Developers
Let’s look at some essential Git commands you’ll use frequently.
Setting Up Git
After installing Git, you need to configure your name and email, which Git associates with your commits.
git config --global user.name "Your Name"
git config --global user.email "your.email@example.com"
Creating a Git Repository
To create a new Git repository, navigate to your project’s directory and initialize a Git repository:
cd your_project_directory
git init
This command creates a hidden .git folder in your project, which Git uses to track changes.
Staging and Committing Changes
Git tracks changes in your project, but to include those changes in the repository, you need to stage and commit them.
- Staging: Add changes to the staging area.
git add .
The . stages all changes in the current directory. You can also specify a file:
git add file.py
- Committing: Once your changes are staged, you commit them to the repository with a message describing the changes.
git commit -m "Initial commit"
Checking the Status of Your Repository
The git status command shows you the current state of your repository, including changes that are staged, changes that haven’t been staged, and files that are not being tracked.
git status
Viewing Commit History
The git log command displays the commit history for your repository. You can see the commit hash, author, date, and commit message.
git log
Pushing Changes to a Remote Repository
After committing changes locally, you can push them to a remote repository like GitHub. First, you need to link your local repository to a remote one.
git remote add origin https://github.com/yourusername/your-repo.git
git push -u origin master
The first command adds a remote repository called origin, and the second command pushes your changes to the master branch of the remote repository.
Working with GitHub
GitHub is a platform that hosts Git repositories. It provides features for collaboration, issue tracking, code reviews, and more. Let’s go through how to create a GitHub repository and push your code.
Creating a GitHub Repository
- Go to https://github.com/ and log in or create an account.
- Click the New button to create a new repository.
- Enter a repository name and choose whether to make it public or private.
- After creating the repository, GitHub will provide instructions to push an existing Git repository or create a new one.
Pushing a Python Project to GitHub
Let’s push an existing Python project to a GitHub repository:
- Initialize a Git repository if you haven’t already:
git init
- Add your project files to the staging area:
git add .
- Commit the changes:
git commit -m "Initial commit"
- Add the GitHub repository as a remote:
git remote add origin https://github.com/yourusername/your-repo.git
- Push your changes to GitHub:
git push -u origin master
Cloning a Repository
If you want to contribute to an existing project or simply download a repository to your local machine, you can clone it using the git clone command.
Example:
git clone https://github.com/username/repository.git
This will create a local copy of the repository on your machine.
Branching and Merging
Branches allow you to create a copy of the project where you can experiment with new features or fixes without affecting the main codebase. Once your changes are tested, you can merge them back into the main branch.
Creating a New Branch
Use the git branch command to create a new branch and git checkout to switch to it.
git branch feature-branch
git checkout feature-branch
Or you can create and switch to a new branch in one command:
git checkout -b feature-branch
Merging Branches
After making changes in your branch, you can merge them into the master branch.
- Switch to the
masterbranch:
git checkout master
- Merge the feature branch:
git merge feature-branch
- If there are no conflicts, the changes from
feature-branchwill be merged into themasterbranch.
Resolving Merge Conflicts
Sometimes Git cannot automatically merge branches because of conflicting changes in the same file. In such cases, Git will mark the conflict in the file, and you’ll need to resolve it manually.
Git indicates conflicts with markers like this:
<<<<<<< HEAD
# Changes from the current branch
=======
# Changes from the feature branch
>>>>>>> feature-branch
After manually resolving the conflict, stage and commit the resolved files:
git add .
git commit -m "Resolved merge conflict"
Pull Requests and Collaboration on GitHub
A pull request (PR) is a way to propose changes to a repository. When you create a pull request, the repository’s maintainers can review your changes, suggest modifications, and eventually merge your code.
How to Create a Pull Request
- Fork a repository: If you want to contribute to a project you don’t own, first fork the repository to create your own copy.
- Clone the fork: Clone the forked repository to your local machine.
- Make changes: Create a new branch, make your changes, and commit them.
- Push the changes: Push your changes to your forked repository.
- Create a pull request: On GitHub, go to your forked repository and click the New pull request button to propose your changes.
Once the pull request is created, the repository maintainers can review, discuss, and approve your changes.
Undoing Changes
Sometimes, you may need to undo changes in your Git repository. There are several commands to handle this:
- Undo Unstaged Changes: Discard changes in your working directory.
git checkout -- filename
- Unstage Changes: Unstage files from the staging area without deleting the changes.
git reset filename
- Undo the Last Commit: Undo the last commit but keep the changes in your working directory.
git reset --soft HEAD~1
Key Concepts Recap
This time, we covered:
- What version control is and why Git is important.
- Basic Git commands for initializing a repository, committing changes, and pushing to GitHub.
- How to use GitHub for hosting and collaborating on repositories.
- Branching, merging, and resolving conflicts.
- Collaborating with others through pull requests.
Using Git and GitHub effectively will improve your workflow, help you track changes, and collaborate with other developers efficiently.
Exercises
- Initialise a Git repository in a new Python project. Add some files and make your first commit.
- Create a new branch in your project, make some changes, and merge the branch back into the main branch.
- Push your project to a new GitHub repository and share the link with someone to collaborate.
- Clone a public repository from GitHub, make some changes, and create a pull request.
FAQ
Q1: What is the difference between git add and git commit?
A1:
git addstages changes. It tells Git to start tracking changes to the specified files or directories. However, the changes are not yet saved in the repository history.git commitactually saves those staged changes into the repository with a message describing what changes were made. A commit creates a snapshot of your project at that point in time.
Example workflow:
git add file.py   # Stage the file
git commit -m "Added new feature"  # Commit the changes to the repository
Q2: How is git pull different from git fetch?
A2:
git fetchonly downloads changes from the remote repository to your local machine. It updates your local metadata about the remote repository, but it doesn’t modify your working directory.git pullis essentially a combination ofgit fetchfollowed bygit merge. It not only downloads the changes but also merges them into your current branch.
Use git fetch if you want to check for updates before merging, and git pull when you’re ready to incorporate remote changes into your branch.
Q3: What should I do if I encounter a merge conflict?
A3: A merge conflict occurs when Git cannot automatically merge changes from different branches because there are conflicting modifications to the same part of a file. To resolve this:
- Open the conflicting file. Git will show the conflicting changes marked by:
   <<<<<<< HEAD
   # Your current branch changes
   =======
   # Incoming changes from the branch being merged
   >>>>>>> feature-branch
- Manually edit the file to resolve the conflict, choosing which changes to keep or combining them as needed.
- Once resolved, stage the file:
git add <filename>
- Commit the resolution:
git commit -m "Resolved merge conflict"
Q4: What’s the difference between git reset, git checkout, and git revert?
A4:
git reset: Moves the current branch to a specific commit, changing both the working directory and staging area. It can undo commits and remove changes from history.git reset --soft: Moves the branch but keeps changes in the staging area.git reset --hard: Moves the branch and discards changes in the working directory.git checkout: Switches to a different branch or commit but doesn’t change the commit history. It’s commonly used to move between branches or revert to a previous commit without altering history.git revert: Undoes a commit by creating a new commit that reverses the changes made by the original commit, preserving history.
Use git reset if you want to change history (e.g., remove commits), git checkout to switch branches or move between commits, and git revert to undo a commit in a safe way that preserves the commit history.
Q5: How can I undo the last commit
A5: If you want to undo the last commit but keep the changes in the working directory, use:
git reset --soft HEAD~1
This will “uncommit” the last commit, but the changes will still be staged.
If you want to undo the last commit and discard the changes, use:
git reset --hard HEAD~1
This will remove both the commit and the changes made in it.
Q6: How do I remove a file from the Git repository but keep it in my local directory?
A6: You can remove a file from the repository (and stop tracking it) but keep the file on your local machine using:
git rm --cached <filename>
This removes the file from the staging area and the next commit, but the file will remain in your working directory.
Q7: What is the purpose of .gitignore?
A7: A .gitignore file tells Git which files or directories to ignore. It’s used to prevent files that shouldn’t be tracked (e.g., sensitive information, configuration files, build artifacts, or large datasets) from being included in commits.
Example .gitignore file:
# Ignore Python bytecode files
__pycache__/
*.pyc

# Ignore environment files
.env
Once added to .gitignore, any files or directories matching the patterns will no longer be tracked by Git.
Q8: What is a “remote” in Git?
A8: A remote is a reference to a version of your project that is hosted somewhere else, typically on platforms like GitHub, GitLab, or Bitbucket. When you push or pull changes, you are interacting with a remote repository.
You can add a remote repository with:
git remote add origin https://github.com/yourusername/your-repo.git
Q9: How do I work with multiple branches in Git?
A9: Branches are used to isolate work in Git. Here are some common commands for working with branches:
- Create a new branch:
git branch feature-branch
- Switch to a branch:
git checkout feature-branch
- Create and switch to a branch in one command:
git checkout -b feature-branch
- Merge a branch into the main branch:
  git checkout master
  git merge feature-branch
- Delete a branch:
git branch -d feature-branch
Q10: How do I fork a repository on GitHub and make a pull request?
A10: Forking allows you to create a copy of someone else’s repository in your GitHub account. You can then make changes to your fork and propose those changes back to the original repository through a pull request (PR).
Steps:
- Fork the repository: Go to the repository on GitHub and click the Fork button.
- Clone your fork: Clone the forked repository to your local machine.
git clone https://github.com/yourusername/repo-name.git
- Make changes: Create a new branch and make your changes.
git checkout -b new-feature
- Push changes: Push your changes to your forked repository.
git push origin new-feature
- Create a pull request: On GitHub, navigate to your forked repository and click New pull request to propose your changes to the original repository.
Q11: How do I rollback to a previous commit without losing my current work?
A11: You can temporarily move back to a previous commit without losing your current changes using git stash. Here’s how:
- Stash your changes: Save your uncommitted changes without committing them.
git stash
- Checkout the previous commit:
git checkout <commit-hash>
- Return to the latest commit and reapply the stashed changes:
   git checkout master
   git stash apply
Q12: What is a fast-forward merge?
A12: A fast-forward merge occurs when the branch you are merging into (usually master or main) hasn’t diverged from the branch you are merging. In this case, Git simply moves the master branch pointer forward to include the new commits, and no actual merge commit is created.
Example:
git checkout master
git merge feature-branch  # Fast-forward merge if there are no diverging commits
Thanks for all the questions, we really do appreciate it. This summary of the most common frequently asked questions FAQ of the common should help address common questions you might have after reading the lesson.
If you have further questions, there are a bunch of resources online including the official Git documentation.